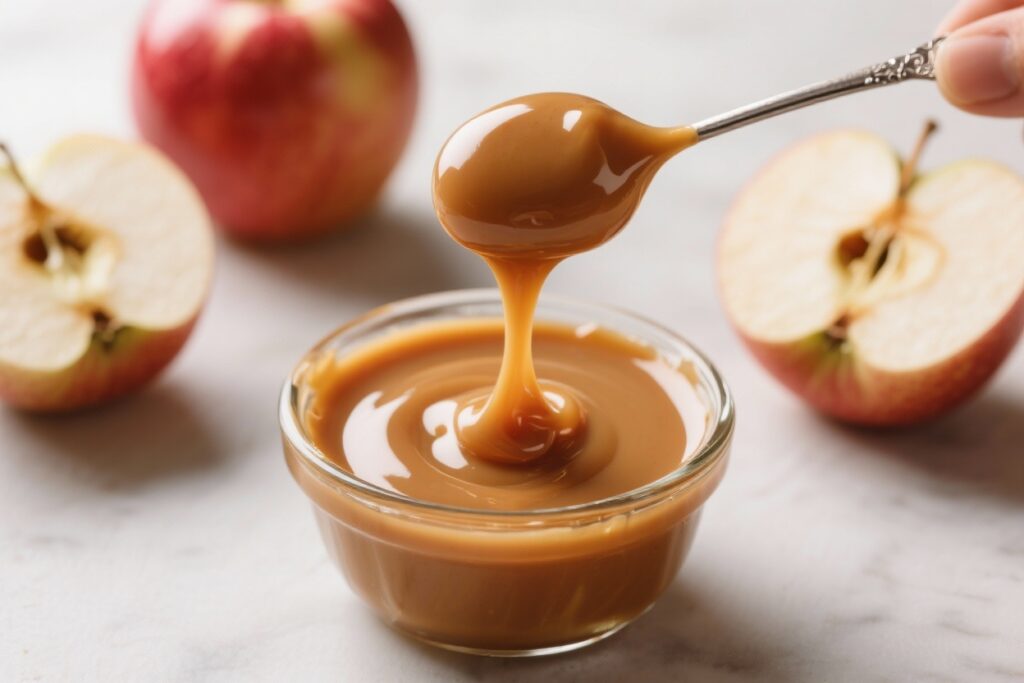
This is the caramel you want when crisp apples are in season and you’re craving a glossy, velvety dip. It’s thick enough to cling to apple slices, but soft and creamy on the tongue. No corn syrup?
No problem—this version uses it for stability, but offers an easy swap if you prefer. With simple ingredients and a few timing tips, you’ll get consistently smooth caramel without graininess. Make a small batch for snacks or scale it up for a fall gathering.
Why This Recipe Works
- Stable texture: A small amount of corn syrup (or honey) prevents crystallization, so your caramel stays silky.
- Balanced sweetness: Brown sugar and vanilla add depth, while salt keeps it from tasting one-note.
- Perfect dipping consistency: Cooked to 240–245°F (soft-ball stage) so it coats apples without sliding off.
- Reliable method: Wet-sand sugar technique and minimal stirring control crystals and burning.
- Make-ahead friendly: Reheats beautifully on the stove or in the microwave without splitting.
Ingredients
- 1 cup packed light brown sugar
- 1/2 cup granulated sugar
- 1/2 cup unsalted butter (1 stick), cut into pieces
- 3/4 cup heavy cream, at room temperature
- 1/4 cup light corn syrup (or honey as a substitute)
- 1/4 teaspoon fine sea salt (plus more to taste)
- 1 teaspoon pure vanilla extract
- Optional: 1–2 tablespoons water to help dissolve sugar
- Fresh apples for dipping (Granny Smith, Honeycrisp, Fuji, or Pink Lady)
Step-by-Step Instructions
- Prep your tools: Set out a medium, heavy-bottomed saucepan, a heatproof spatula, and a candy thermometer.
Have the cream measured and at room temp. Line a bowl or tray for apple slices.
- Combine sugars and syrup: Add brown sugar, granulated sugar, and corn syrup to the saucepan. Add 1–2 tablespoons water to help the sugar dissolve evenly.
- Start melting: Cook over medium heat, stirring just until the sugars look evenly moistened.
Then stop stirring. Swirl the pan gently as needed to prevent hot spots.
- Add butter: Once the mixture begins to bubble, add the butter pieces. Let them melt, swirling occasionally.
Avoid vigorous stirring—it can trigger crystals.
- Cook to color: Continue cooking until the mixture is a deep amber and reaches about 320°F if you’re checking. If not using a thermometer yet, watch for a rich caramel color and toasty aroma.
- Carefully add cream: Remove from heat and slowly pour in the heavy cream while stirring. The mixture will bubble up dramatically—this is normal.
Return the pan to medium-low heat.
- Cook to dipping stage: Clip on the thermometer and cook, stirring gently, until it reaches 240–245°F (soft-ball stage). This ensures a thick but dip-friendly consistency.
- Finish with flavor: Remove from heat. Stir in vanilla and salt.
Taste carefully (it’s hot) and adjust salt to balance sweetness.
- Cool slightly: Let the caramel rest 10–15 minutes to thicken. For dipping apples, you want it warm and glossy—not scorching.
- Serve: Slice apples and pat them dry. Dip and twist to coat.
If the caramel thickens too much, gently rewarm over low heat or in short microwave bursts.
How to Store
- Refrigerator: Transfer cooled caramel to a clean jar. Seal and refrigerate up to 2 weeks.
- Freezer: Store in a freezer-safe container for up to 2 months. Thaw overnight in the fridge.
- Reheating: Warm gently over low heat on the stovetop or microwave in 15–20 second intervals, stirring between bursts.
If it’s too thick, whisk in a splash of cream.
Health Benefits
Caramel is a treat, so think moderation. That said, pairing it with apples has perks. Apples bring fiber, vitamin C, and polyphenols that support gut health and may help balance blood sugar spikes when eaten with sweets.
Using real dairy provides calcium and fat, which can help with satiety.
A pinch of salt also enhances flavor, so you enjoy a smaller portion more. For a lighter option, serve smaller dips with plenty of crisp apple slices.
Common Mistakes to Avoid
- Stirring too much: Over-stirring early on encourages sugar crystals. Swirl the pan instead.
- Cold cream shock: Adding cold cream can seize the caramel.
Use room-temperature cream.
- Skipping a thermometer: You can eyeball color, but for consistent dipping texture, a thermometer is the most reliable tool.
- Rushing the cool-down: If you dip apples while the caramel is piping hot, it may slide off. Let it thicken slightly first.
- Wet apples: Water dilutes caramel and makes it slip. Pat slices dry before dipping.
Recipe Variations
- Salted caramel: Increase salt to 1/2 teaspoon and finish with a sprinkle of flaky sea salt.
- Maple twist: Replace 2–3 tablespoons of the brown sugar with real maple syrup for a warm, earthy note.
- Spiced caramel: Add 1/2 teaspoon cinnamon and a pinch of nutmeg or cardamom with the vanilla.
- Bourbon caramel: Stir in 1 tablespoon bourbon off heat with the vanilla.
Cook 1 minute more to mellow the alcohol bite.
- Honey-sweetened: Swap corn syrup for honey. Flavor will be slightly floral; texture remains smooth.
- Dairy-free: Use coconut cream and vegan butter. Cook to 238–240°F to keep it soft; flavor will have a coconut note.
FAQ
Why did my caramel turn grainy?
Crystals form when sugar on the pan’s sides hardens and falls back in.
Avoid excessive stirring, use corn syrup or honey for stability, and wash down the sides with a wet pastry brush if needed. A heavy-bottomed pan also helps maintain even heat.
How do I fix caramel that’s too thick?
Warm it gently and whisk in 1–2 tablespoons of cream until it loosens. Heat on low and stir until smooth, being careful not to scorch.
Can I make this ahead for a party?
Yes.
Make it up to 3 days ahead and refrigerate. Reheat slowly before serving and keep it warm in a small slow cooker or over a double boiler for easy dipping.
What apples are best for dipping?
Granny Smith for tart contrast, Honeycrisp for juicy crunch, Fuji for sweetness, and Pink Lady for balance. Mix varieties for a nice range of flavors.
Do I need a candy thermometer?
It’s highly recommended for consistent results.
If you don’t have one, aim for a deep amber color and test a small spoonful—when it cools slightly, it should coat fruit without running.
Can I use white sugar only?
You can, but brown sugar adds a richer, toffee-like flavor. If using only white sugar, consider a touch more vanilla and an extra pinch of salt for depth.
Will the caramel harden on the apples?
This recipe stays soft and chewy rather than hard. It sets enough to cling to apples but remains bite-friendly for dipping and eating right away.
Final Thoughts
Homemade caramel for apples is one of those simple treats that feels special every time.
With a steady heat, a reliable thermometer, and a few smart tricks, you’ll get glossy, spoon-worthy caramel that actually sticks to your slices. Keep apples dry, let the caramel cool slightly, and serve warm for the best texture. It’s an easy win for weeknight snacks, fall parties, or anytime you’ve got crisp apples on the counter.
Printable Recipe Card
Want just the essential recipe details without scrolling through the article? Get our printable recipe card with just the ingredients and instructions.